Cecilie Hjorth © 2021

Easy Raw Vegan Granola Recipe!

Hi guys and welcome back to the blog!

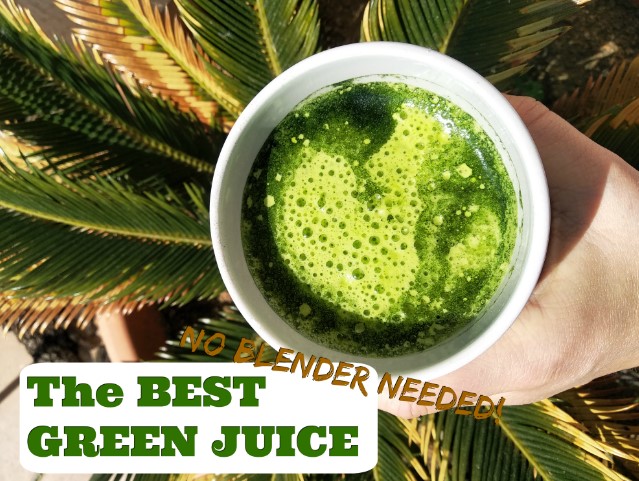
Today we keep going along the raw vegan ride! I just posted a super exciting interview on my YouTube channel, with raw food guru Lissa Raimondi, otherwise known as Lissa's Raw Food Romance. In the name of that I want to share this super easy, delicious and everyday raw vegan recipe. My easy raw vegan granola!

Most people think granola is a health food, but if you read the ingredient list of most granola's in your supermarket, you will find they are packed with refined sugar, oils and even chemicals. Even so called organic granola can be packed with cane sugar and oil, which are absolutely not foods that support health. This granola is free from all of that, and it is gluten free as well. You do need a dehydrator to make this granola, but you can also make it in the oven on the lowest setting, baking with the oven door slightly open. If you do want a dehydrator, this is the dehydrator I use: https://amzn.to/2Ur0uCr and here is a cheaper option: https://amzn.to/37n7YM6. I highly recommend getting one, mine is in use on a weekly basis and I will be having more recipes coming! For just 70 USD you can get a pretty decent dehydrator!

Easy Raw Vegan Granola
 
Author: Cecilie Hjorth
PREP TIME: 15 minutes
TOTAL TIME: 12 hours and 15 minutes
Servings: 10 portions
Category: Breakfast / Snack
Cuisine: Gluten-Free, Vegan, Low-Fat, Sugar-Free, Oil-Free, Raw Vegan
Does it keep? 1-2 months in an air tight container in the fridge
  

Ingredients

Instructions

  1. Measure the buckwheat and soak overnight.

  2. A few hours before making the granola, soak chopped dates, nuts and raisins. 

  3. Add all ingredients for the granola in a bowl, finishing up with adding the protein powder, cinnamon, salt and agave syrup. Mix well

  4. Spread the granola evenly on a dehydrator sheet. You want it to stick together, but make the layer thin enough for it to dehydrate well. If making it in the oven, keep the oven on the absolute lowest setting and bake overnight with the oven door slightly open for the air to flow well

  5. After 12 hours, check if the granola is crunchy. It should stick together in big, dry chuncks. If needed, dehydrate for longer time

  6. Once done, serve and enjoy! I love mine on top of a smoothie bowl. Add remainder to an air tight container and place in the fridge!

I hope you like it! If you make it, take a photo and tag @celiahjorth on Instagram and I will re-share it on my stories!

Want more?
 
RawAbundance FinalCover 3d 

Check out my Raw Vegan Recipe book, Raw Abundance,  with over 30 delicious, healthy meals that are completely model diet approved! USE THE DISCOUNT CODE 2020 and get 20% off!
 
Subscribe to my newsletter to get a free guide on CDS.
 
See the interview with Lissa here!


Oil Free 10 Minute Granola (Vegan)

Vegan Granola

Hi guys! Another week, another healthy recipe!

How are you all doing with quarantine? Bored yet? Let me know in the comments.

If you haven't already, please go subscribe to my Youtube channel here.  I'm sure to keep you entertained! I have updated my schedule, so you will have healthy recipes and What I eat in a day videos, among others, every single week. Come join the fam:)

This week, I decided to post one of my go-to recipes. *I may have made it 10 times in the last month or so*

I love this recipe so much because I am a bit of a granola sucker, and to be honest, most granolas that you can buy in supermarkets, or even the health food stores, are not healthy. They are filled with oils, sugars or sweeteners and most of the time, gluten. I tend to steer away from them.

If you are like me, you do not have to be granola deprived any longer! The rescue is here!

This granola recipe is amazing becase you only need 1 bowl, and 15 minutes to make it. I make it many times before breakfast because it is so quick! Enjoy the recipe below and see the full instructions on my Youtube channel. Please share with everyone who could use some more healthy granola in their life!

10 Minute Oil Free Granola! (Vegan, GF and SF)

 
Author: Cecilie Hjorth
PREP TIME: 5 minutes
TOTAL TIME: 15 minutes
Servings: 4-5 cups of granola
Category: Breakfast / Snack
Cuisine: Gluten-Free, Vegan, Low-Fat, Sugar-Free, Oil-Free, 1-Bowl
Does it keep? 1 month in air-tight container
  

Ingredients

Date Syrup (optional)*

*If you don't want to use date syrup, you can use 1/2 cup agave or maple syrup instead. See video for instructions on this.

Instructions

  1. Turn on the oven on 350 °F (175 °C)


  2. Pit, and soak the dates in the water for 2 hours.


  3. Add the dates, water, vanilla and salt to a high speed blender and blend until completely smooth. (Omit if using syrup)

  4. Add all the dry ingredients to a bowl. Mix well.


  5. Add the syrup of your choice and mix well. It should be sticky and stick together in clusters.


  6. Spread on a baking tray with baking paper on. Spread in to a thin layer. Add to the oven and bake for 10 minutes! Don't worry if it seems a bit moist when it comes out, once it dries it will become crunchy. Let it cool for 20 minutes before eating or adding to a container.


I hope you like it! If you make it, take a photo and tag @celiahjorth on Instagram and I will re-share it on my stories!

Want more?
 

Check out my Raw Vegan Recipe book, Raw Abundance,  with over 30 delicious, healthy meals that are completely model diet approved!
 
Subscribe to my newsletter to get a free guide on CDS.


The BEST Green Juice Recipe (NO BLENDER)

GreenJuice

Are you ready to get greenyfied?

Welcome back to the blog! Today I am going to share one of my absolute go-to recipes, my daily green juice. I want to share it with you, because it is so simply and so easy to make. In my personal opinion, starting your day with fresh greens and liquid, is one of the best things you can do for your skin, health, happiness and energy levels.

While there is not much research on the subject yet, research suggests that eating greens on the daily can help reduce inflammation, heart-disease risk and age-related mental decline. There is also evidence that certain compounds in fresh juice can function as prebiotics, and prebiotics are related to healthy digestion, weight management and improved immune function (source). Simply put, it is also a very easy way to get in your daily dose of greens without having to chow down a giant bowl of salad!

While the juicing process can entail having a fancy juicer, going through pounds and pounds of fresh greens and vegetables, I wanted to make this recipe which is easy, simple and accesible for the average person with an average kitchen! Minimal dishes need to be cleaned!

If you haven't tried a green juice yet, and if the thought sounds unpleasent to you, please don't let it stop you. Because of the coconut water, this green juice has a pleasent and mild sweet taste that matches wonderfully with the earthy taste of the greens. Give it a try and let me know what you think!

BEST Green Juice Recipe (NO BLENDER NEEDED)

 
Author: Cecilie Hjorth
PREP TIME: 5 minutes
TOTAL TIME: 5 minutes
Servings: 1-2 cups of green juice
Category: Breakfast / Drink
Cuisine: Raw Vegan, Juicing
Does it keep? 2 days in a glass bottle in the fridge
  

Ingredients

Instructions

  1. Wash the greens thoroughly. Juice the lemon. Add all the ingredients to a blender and blend until smooth.

  2. Serve and drink fresh!

If you need more liquid, you can always add more coconut water! It stays good in the fridge for up to 2 days, but it is best drinked straight away for the taste and nutritional content.

Want more?
 
RawAbundance FinalCover 3d

Check out my Raw Vegan Recipe book, Raw Abundance,  with over 30 delicious, healthy meals that are completely model diet approved!
 
Subscribe to my newsletter to get a free guide on CDS.

THE BEST RAW VEGAN CINNAMON ROLLS

Hi guys! And welcome back!!
 
Screenshot 2

Today I am super excited to share a recipe with you all which honestly really surpassed my expectations. It is made with such few ingredients - bananas being one of the main ones. And if I may say so myself, I do happen to be a very experienced cinnamon roll eater, which is one the recipes I grew up with and happened to be one of my mom's expertise recipes. So there was a lot at stake making this recipe! But when I took the first bite, there was no way back. Oh my God, so filled to the brim with cream that I couldn't help but fall in love! And it's just made with fruit? HOW?? 
 
Keep reading to learn how!


Raw Vegan Cinnamon Rolls
 
Author: Cecilie Hjorth
PREP TIME: 15 minutes
TOTAL TIME: 12 hours and 15 minutes
Servings: 10 small cinnamon rolls
Category: Dessert / Snack
Cuisine: Gluten-Free, Vegan, Low-Fat, Sugar-Free, Oil-Free, Raw Vegan
Does it keep? 1-2 days in the fridge. Eat fast as banana oxidizes quickly.
  

Ingredients

Tools needed

Instructions

  1. Prepare the bananas the night before so they can dehydrate the overnight. See video below for full instructions. Slice the bananas into 3-4 pieces, lengthwise, and place them on the dehydrator tray. Dehydrate overnight at 40 Celsius (115 Fahrenheit)

  2. The morning after, check the texture of the bananas. They have to be rubbery yet firm. 

  3. Once you are ready to prepare the filling, add dates and cinnamon to a high speed blender. I recommend a vitamix. Add a bit of the water from the soaked dates in order for it to blend more effeciently. Blend until completely smooth and creamy. This filling lasts a week in the fridge, so you can prepare beforehand if you wish.

  4. Spread the filling along a banana slice, lengthwise, and roll it up. Repeat, and roll the next banana slice round the first already rolled one, in order to make a bigger cinnamon roll. You can even use small or broken pieces of the banana, as they can all help make the cinnamon roll bigger. 

  5. Once all rolled up, add to the dehydrator for another 1-2 hours. This will heat them up slightly and make them more firm. This step is optional but I found they came out more delicious like this!

  6. Once done, make the icing by mixing cashew butter, agave syrup and vanilla well. Top the cinnamon buns generously with this. 

  7. Ready to eat! Best to eat right away, they last only 1-2 days in the fridge before the banana part gets too oxidized. 

I hope you like it! If you make it, take a photo and tag @celiahjorth on Instagram and I will re-share it on my stories!

See video instructions here:

Want more?
 
RawAbundance FinalCover 3d 

Check out my Raw Vegan Recipe book, Raw Abundance,  with over 30 delicious, healthy meals that are completely model diet approved! USE THE DISCOUNT CODE 2020 and get 20% off!
 
Subscribe to my newsletter to get a free guide on CDS.

CECILE HJORTH

Copyright © 2020
All information, content, images and logos on this site contain trademark registration and intellectual property rights of the author under the international regulations of Creative Commons Attribution International license. It is forbidden the partial or total reproduction of what is shown here without prior consultation and / or request.
Stay Connected

Newsletter