Cecilie Hjorth © 2021

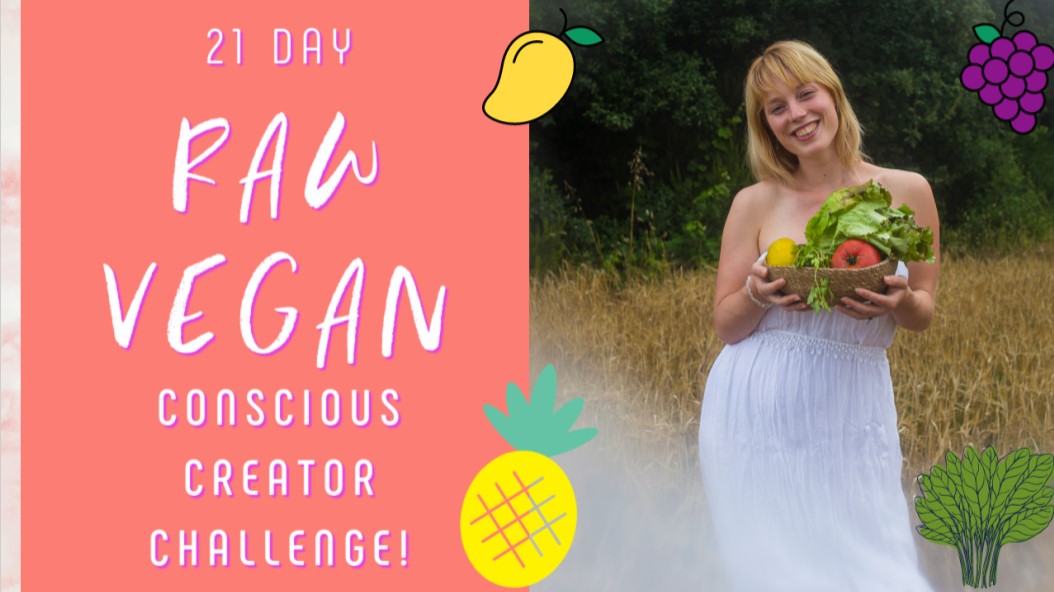
21 Day Raw Vegan CONSCIOUS CREATOR Challenge!

Hi guys and HAPPY NEW YEAR!!!

It's the new year and everyone wants to go strong on their new, healthy goals. It's no secret that most of those intentions do not last very long. The intentions were good, but the planning not always. Therefore, I have decided to start a challenge that can get you on the right foot for 2021 while not being too difficult to implement. 

For the new year, I want to present a new challenge that I want to be doing with and for you guys! This challenge is a RAW VEGAN CONSCIOUS CREATOR challenge that I will be doing all with the intent of increasing our creative energies and becoming more powerful conscious creators!

How does Raw Veganism really play a key in that, you may think?

origin

Well, there are a few things to take into account:

1. Digestion takes up A LOT of energy! Exactly how much depends on what kind of food you eat, as for instance proteins and fat take more energy for the body to digest than for instance simple carbs. Scientists estimate that digestion takes up 15% of our daily energy, but some people even say it is up to 60% of our vital energy. It is still a questions that needs to be studied more in depth, but it is very interesting because it poses the question, that if our foods are more simple and easy to digest, will we have more energy available for other things? Such as focus, intention and manifesting our desires?

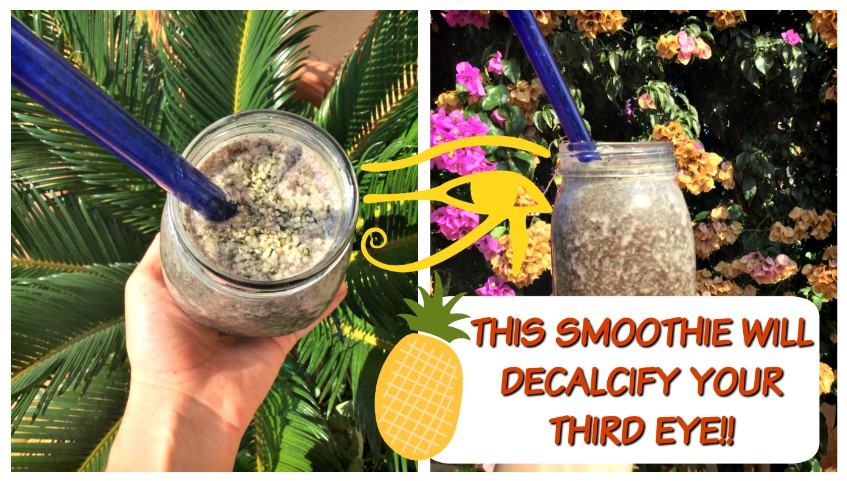
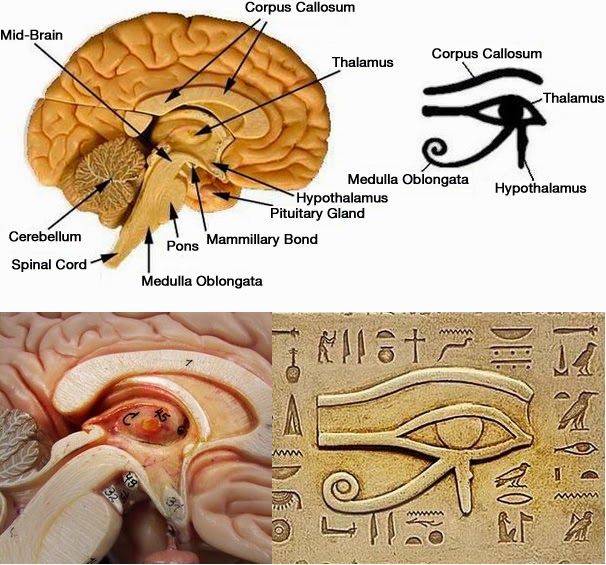
2. Raw vegan foods are actually the ONLY foods that contain biophoton energy, otherwise known as lifeforce energy. This energy is VITAL for us as this not only is what keeps our entire system in balance, but it is also the kind of energy that helps us manifest. Life force energy is the same energy as our energy of focus. The more we ingest this, the more powerful our creative capacities become. 

3. Can we all agree that most fruits and vegetables are healthy? Physical health is essential for being a conscious creator. You can imagine your body as your vehicle and in order to travel through life smoothly, and have a beautiful ride, you need to take care of your vehicle. Of course, you also need to take care of the driver, but for now we are focusing on the body. The more you fill your body with healthy foods filled with Vitamins and Minerals, the better you can expect the ride of life to be!

I wanted to start a challenge that is practical, and something that we can all comprehend. Becoming a conscious creator may seem like an esoteric term, but in reality the path there is very practical as it is through our physical body that we achieve it. 


THE CHALLENGE

The challenge will be for 21 days starting TOMORROW (!), and I will be posting a video almost every single day of what I eat, tips and tricks, recipes, scientific facts etc. For the first week, we will be including just ONE RAW VEGAN MEAL a day! Only ONE! That is something almost everyone can do and I will be sharing with you the easiest way to do it.

For the second week, we will be doing TWO RAW VEGAN MEALS a day, and for the last week we will be doing FULLY RAW VEGAN! I will be doing it all with you guys!!!


THE GIVEAWAY

At the end of the challenge, there will be a GIVEAWAY to a special winner! I will be giving away a free copy of "How to Communicate with the Angels", along with a beautiful spread of raw vegan nut butters from My Raw Joy. The way you can participate in the giveaway, is by doing the following:

1. Subscribe to my YouTube channel and newsletter

2. Like and comment on every single video of the challenge, sharing your experience and progress with us!

3. Follow me on all social media accounts (@celiahjorth @celiasveganjourney @consciouscreatorreality)

4. OPTIONAL but gives bonus points: post photos on social media of your progress and tag me on all the three accounts above. 

Will you join?? I hope to see you there ! Let's do this together and let's make 2021 the best year of our life so far :) That is my goal for every year and it starts right now!

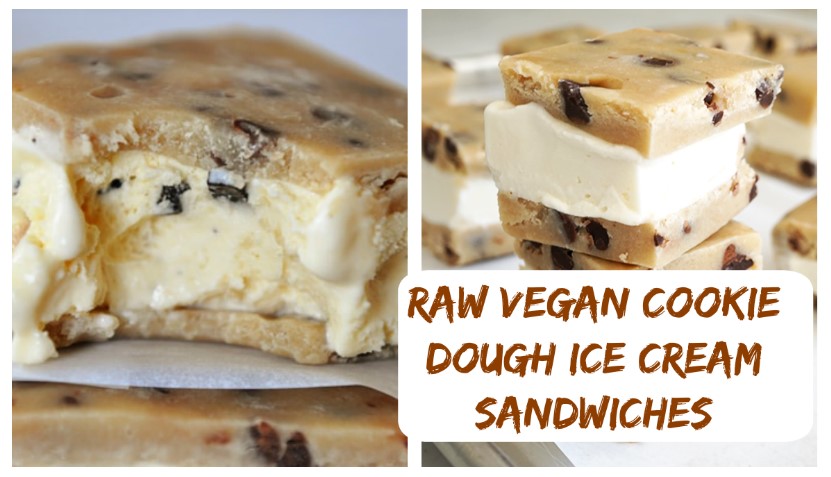
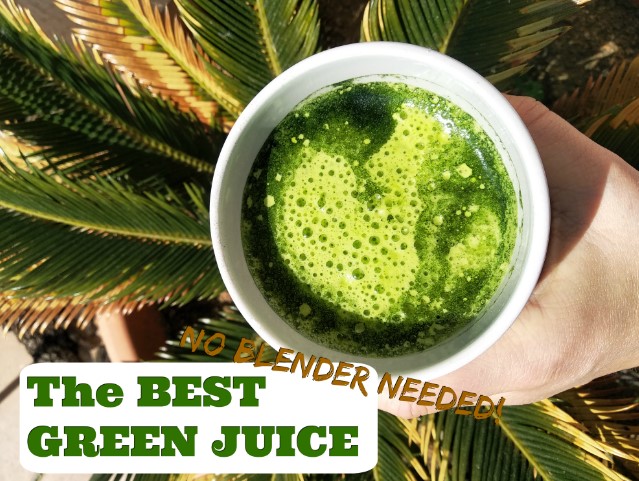
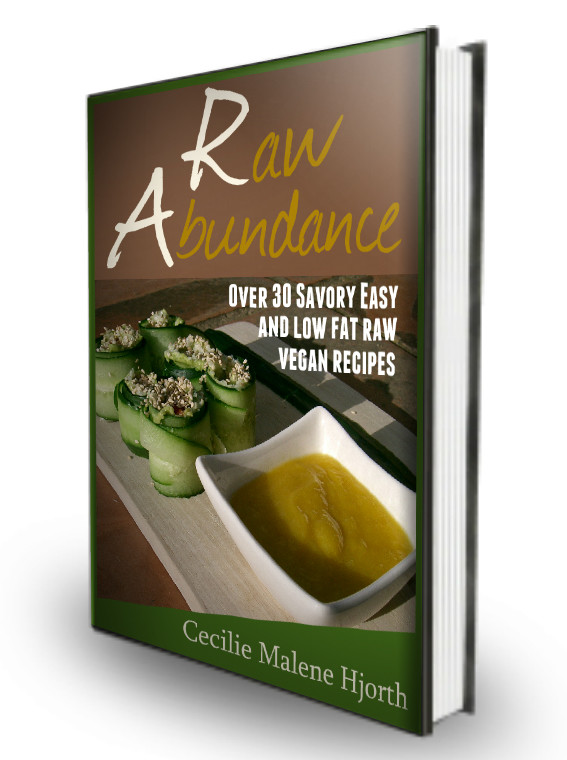
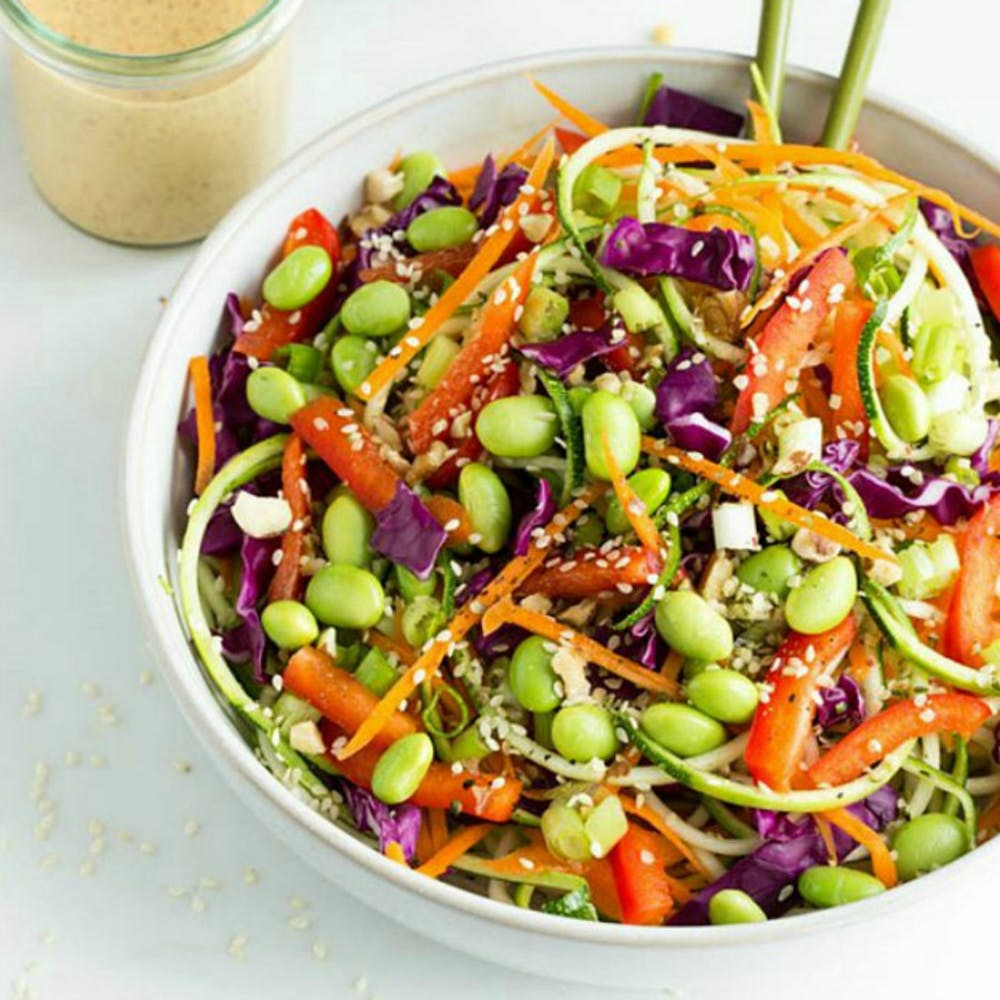
If you want more inspiration to what meals you can have already, check out my recipes on my YouTube channel, as well as Raw Abundance which contains over 30 savory raw vegan recipes.

RawAbundance FinalCover 3d

Cookie Dough Ice Cream Sandwiches! (Raw Vegan!)

Screenshot 1

Hi Guys! Welcome back to the food blog ;)

Today we have one of the most decadent summer recipes I know of, the amazing ice cream sandwich. Only this time, we have made it #modeldiet worthy, filled it with all the good stuff and left all the not-so-good-for-you stuff out!

The recipe is pretty simple and straight forward, you just need a blender and a freezer. I bet you want to get on with the reading now and just make the recipe. Let's go!

Cookie Dough Ice Cream Sandwiches (Raw Vegan)
 
Author: Cecilie Hjorth
PREP TIME: 15 minutes
TOTAL TIME: 3 hours
Servings: 4-6 cookie dough ice cream sandwiches
Category: Dessert / Snack
Cuisine: Gluten-Free, Vegan, Low-Fat, Sugar-Free, Oil-Free, Raw Vegan
Does it keep? 1 month in the freezer
  

Ingredients

Tools needed

Instructions

  1. Add all the dough ingredients except oat flour and cacao nibs to a blender. Blend until smooth, don't worry if it's a bit runny since you will be adding the flour.

  2. Add flour and cacao nibs and divide into two. Spread into two seperate square molds lined with parchment paper. Add to the freezer for 60 minutes

  3. After an hour, take the cookie dough squares out of the freezer. Start preparing the ice cream by adding two frozen bananas, a dash of vanilla and plant milk to a high speed blender and blend until creamy

  4. Spread the ice cream on one of the cookie dough squares. Add the other square on top and freeze for another hour! A bonus tip is to spread a bit of peanut butter mixed with agave syrup on one or both squares as it makes the ice cream sandwiches extra delish!

  5. After an hour, take out the big ice cream sandwich and cut it up into 4-6 sandwiches. Ready to serve and eat like this or re-freeze them for a future delight! Let them thaw for 2-3 minutes before eating them as the banana ice cream can be a bit hard.

I hope you like it! If you make it, take a photo and tag @celiahjorth on Instagram and I will re-share it on my stories!

RawAbundance FinalCover 3d


If you liked this recipe, check out my Raw Vegan Recipe book, Raw Abundance,  with over 30 delicious, healthy meals that are completely model diet approved! USE THE DISCOUNT CODE 2020 and get 20% off!
 
Subscribe to my newsletter to get a free guide on CDS.

Oil Free 10 Minute Granola (Vegan)

Vegan Granola

Hi guys! Another week, another healthy recipe!

How are you all doing with quarantine? Bored yet? Let me know in the comments.

If you haven't already, please go subscribe to my Youtube channel here.  I'm sure to keep you entertained! I have updated my schedule, so you will have healthy recipes and What I eat in a day videos, among others, every single week. Come join the fam:)

This week, I decided to post one of my go-to recipes. *I may have made it 10 times in the last month or so*

I love this recipe so much because I am a bit of a granola sucker, and to be honest, most granolas that you can buy in supermarkets, or even the health food stores, are not healthy. They are filled with oils, sugars or sweeteners and most of the time, gluten. I tend to steer away from them.

If you are like me, you do not have to be granola deprived any longer! The rescue is here!

This granola recipe is amazing becase you only need 1 bowl, and 15 minutes to make it. I make it many times before breakfast because it is so quick! Enjoy the recipe below and see the full instructions on my Youtube channel. Please share with everyone who could use some more healthy granola in their life!

10 Minute Oil Free Granola! (Vegan, GF and SF)

 
Author: Cecilie Hjorth
PREP TIME: 5 minutes
TOTAL TIME: 15 minutes
Servings: 4-5 cups of granola
Category: Breakfast / Snack
Cuisine: Gluten-Free, Vegan, Low-Fat, Sugar-Free, Oil-Free, 1-Bowl
Does it keep? 1 month in air-tight container
  

Ingredients

Date Syrup (optional)*

*If you don't want to use date syrup, you can use 1/2 cup agave or maple syrup instead. See video for instructions on this.

Instructions

  1. Turn on the oven on 350 °F (175 °C)


  2. Pit, and soak the dates in the water for 2 hours.


  3. Add the dates, water, vanilla and salt to a high speed blender and blend until completely smooth. (Omit if using syrup)

  4. Add all the dry ingredients to a bowl. Mix well.


  5. Add the syrup of your choice and mix well. It should be sticky and stick together in clusters.


  6. Spread on a baking tray with baking paper on. Spread in to a thin layer. Add to the oven and bake for 10 minutes! Don't worry if it seems a bit moist when it comes out, once it dries it will become crunchy. Let it cool for 20 minutes before eating or adding to a container.


I hope you like it! If you make it, take a photo and tag @celiahjorth on Instagram and I will re-share it on my stories!

Want more?
 

Check out my Raw Vegan Recipe book, Raw Abundance,  with over 30 delicious, healthy meals that are completely model diet approved!
 
Subscribe to my newsletter to get a free guide on CDS.


Raw Vegan Brownies - What Models Eat

Hi guys and welcome back to the blog!

Today I want to share one of my most decadent, yet healthiest dessert recipes to date. The classic brownie! Except this time it is raw vegan and made from only 3 key ingredients. It tastes just like a dessert but it is the kind of food that you can eat as a snack on a daily basis and still stay healthy and fit. This is what models eat!

There are a lot of raw vegan brownie recipes out there, but I wanted to make one that is simple, based on whole food ingredients and low in fat. And I think I found the perfect combo! Try it out and let me know if you agree!

Raw Vegan Brownies
 
Author: Cecilie Hjorth
PREP TIME: 15 minutes
TOTAL TIME: 15 minutes
Servings: 16 pieces of brownie
Category: Dessert / Snack
Cuisine: Gluten-Free, Vegan, Low-Fat, Sugar-Free, Oil-Free, Raw Vegan
Does it keep? 2 weeks in the fridge or 2-3 months in the freezer
  

Ingredients

Avocado Glazing

Instructions

  1. Pit and soak the dates in water for 2 hours.

  2. Add all ingredients for the brownie in a high speed blender or food processor and blend until well mixed and it reaches a cake dough consistency.

  3. Place the dough in a cake pan and press down to spread it evenly. Add to the freezer for 30 minutes.

  4. Add all the glazing ingredients to a bowl. Mash together with a fork until the glazing has a smooth and creamy consistency.


  5. Take the cake out of the freezer and top with the glazing. Spread evenly.


  6. Ready to serve! It can keep in the fridge for up to 2 weeks, and in the freezer for a few months. If you can keep your hands off of it for that long ;)


I hope you like it! If you make it, take a photo and tag @celiahjorth on Instagram and I will re-share it on my stories!

Want more?
 
RawAbundance FinalCover 3d 

Check out my Raw Vegan Recipe book, Raw Abundance,  with over 30 delicious, healthy meals that are completely model diet approved! USE THE DISCOUNT CODE 2020 and get 20% off!
 
Subscribe to my newsletter to get a free guide on CDS.


Smoothie that will decalcify your pineal gland!

Screenshot 8

Hi guys! Welcome back to the blog!

As you all know, I love sharing recipes with you all. I just love food. And to eat. Is that why I am a curvy model maybe? :D

I decided I wanted to make my recipes a bit more functional. I have been spending the whole week learning intensely about secret societies, conspiracy theories, illuminati etc and I have felt slightly inspired to upgrade my own habits a bit, so in case any of those conspiracy theories are true, ain't nobody gonna funk with my third eye! Definitely keep up with my Youtube channel to see everything I am learning about these conspiracy theories.


16125e84bffe643180b17d4094400ac6 1

The third eye has been depicted throughout the ages as a mystical symbol with a lot of importance and value, and just today we are starting to realize the science behind it. In the ancient texts, the eye of horus was a symbol for many things, among one protection, good health and royal power. It was said that the eye of horus could protect against evil spells and it was referred to as the eye of God, the eye of the mind, the eye of truth and insight. Now we are starting to realize that the symbol itself actually represents pathways in the brain, and it comes to light that the egyptians knew a lot more about human anatomi and physiology than previously assumed.

To make a long story short, the pineal gland is a tiny, pea-sized gland located between your eyes, at the back of your brain. It is responsible for melatonin production, hence regulating sex and sleep urges, and it has recently been found that it contains photoreceptors, so it can actually perceive and interpret light! Just like our eyes. It is also responsible for interpreting the light entering our eyes in order to regulate melatonin production, but this also means that it is responsible for our perception and interpretation of everything we see! Perhaps the name third eye makes more sense now...

Hero Gland Pineal

In the western world, most people have a calcified pineal gland, due to the ingestion of chemicals such as flouride (through tap water or dental hygiene products) and calcium. These get stored in the pineal gland and inhibit its function. This can interfere with sleep patterns, sex drive and, according to esoteric traditions, it can interefere with your intuition, ability to see higher frequencies, and access to higher knowledge and wisdom. I personally have have had a few experiences with practices that definitely did something positive to my third eye and it did lead to an increased intuition and knowing. I already see certain high frequency objects at times, such as light orbs and the etherial aura of people, but it is only when I am more centered and calm. I owe this, in part, to many of the healthy, natural foods that I eat!

In order to decalcify the pineal gland, the first step is to eliminate the causes of calcification, so eliminate tap water and include organic, natural dental products without flouride added in place of the mainstream ones (shhh, I use mms and it is the best thing that has ever happened to my teeth, see video on my YouTube channel). Secondly, we want to take some measures to actually decalcify the gland! There are many things you can do, such as meditation, breathing exercises, physical exercises and diet changes. Today I am going to share with you a very simple recipe that contains all ingredients that benefit and support the decalcification of the pineal gland! Keep on reading to get decalcified!

Pineal Gland Decalcifying Smoothie!
 
Author: Cecilie Hjorth
PREP TIME: 5 minutes
TOTAL TIME: 10 hours
Servings: 2 smoothies
Category: Breakfast / Snack
Cuisine: Gluten-Free, Vegan, Low-Fat, Sugar-Free, Oil-Free, Raw Vegan
Does it keep? 1 day in the fridge
  

Ingredients

  • 2 cups fresh, ripe, raw pineapple 
    helps boost melatonin levels naturally! And hey, pineapples are named after the pineal gland, coincidence?
  • 1 cup frozen blueberries (wild and organic is best) 
    helps boost the glympathic system (the lymphatic system of the brain) hence helps in the cleansing of the pineal gland!
  • 1 Tbsp Chlorella 
    helps remove heavy metals from the blood stream, so that the blood sorounding the pineal gland is clean!
  • 2 tsp MSM 
    super high in sulfur which, together with Iodine, is one of the best minerals to cleanse out flouride.
  • A handful of wild greens
    not sure what they do for the pineal gland, but I am sure it is many great things :D See here the best tool to identify wild greens!
  • 2 cups coconut water (fresh if possible)
    super high in iodine which helps cleanse out flouride!
  • 2 Tbsp chopped fresh cilantro (OPTIONAL) 
    Binds with and cleanses out heavy metals like chlorella!

Tools needed

Instructions

  1. Add all the ingredients to a blender and blend until completely smooth! 

  2. That's it, serve and enjoy! Best enjoyed straight away for taste and optimal nutritional content. I find it delicious topped with some raw hemp seeds.

I hope you like it! If you make it, take a photo and tag @celiahjorth on Instagram and I will re-share it on my stories!

RawAbundance FinalCover 3d

If you liked this recipe, check out my Raw Vegan Recipe book, Raw Abundance,  with over 30 delicious, healthy meals that are completely model diet approved and that definitely will help decalcify your third eye! USE THE DISCOUNT CODE 2020 and get 20% off!
 
Also do check out Markus Rothkranz book, free food and medicine, which is my wild green bible! With over 400 plants in there, you get to learn plenty about what plants from the wild you can eat and which you can't. Get it here.
 
Freefood 
Subscribe to my newsletter to get a free guide on CDS.

The BEST Green Juice (No Juicer Needed)

Hi guys! Welcome back to the Raw Vegan Challenge, day 2! 

Today I am going to share with you one of my go-to recipes, which is a nutrition bomb of deliciousness! It is a green juice that everyone can make, because it only requires a blender, not a juicer. I wanted to share this one as one of the first recipes of the challenge, because for the first week, we are doing one raw vegan meal per day and this can be your raw vegan meal! Start your day with a green juice, then a breakfast following, and you are already off for the right start!

The juice consist of greens of course, but more importantly of specific supplements and superfoods that have highly beneficial ingredients. See more in the video below about the exact benefits of each supplement:


The BEST Green Juice!
 
Author: Cecilie Hjorth
PREP TIME: 5 minutes
TOTAL TIME: 5 minutes
Servings: 1 Juice
Category: Breakfast / Snack
Cuisine: Gluten-Free, Vegan, Low-Fat, Sugar-Free, Oil-Free, Raw Vegan
Does it keep? 1-3 days in the fridge
  

Ingredients

  • 2 cups fresh, organic spinach
    High in minerals and fiber
  • 1 Tbsp Chlorella 
    helps remove heavy metals from the blood stream, helps repair damaged DNA from radiation exposure, high in iron and chlorophyll.
  • 1-2 tsp MSM 
    super high in sulfur which, great for hair, skin, nails and sleep.
  • 1 Tbsp Wheatgrass
    Very high in Vitamin C,K,A and E, helps reduce cancer growth and some people even say it helps bring the color of grey hair back!
  • 2 cups coconut water (fresh if possible)
    super high in iodine and minerals!
  • 1/2 scoop Sun Warrior Collagen peptides protein (natural flavor)
    High in protein and gives a boost of silica which helps with hair, skin and nails

Tools needed

Instructions

  1. Add all the ingredients to a blender and blend until completely smooth! 

  2. That's it, serve and enjoy! Best enjoyed straight away for taste and optimal nutritional content.

I hope you like it! If you make it, take a photo and tag @celiahjorth on Instagram and I will re-share it on my stories!

RawAbundance FinalCover 3d

If you liked this recipe, check out my Raw Vegan Recipe book, Raw Abundance,  with over 30 delicious, healthy meals that are completely model diet approved and that definitely will help decalcify your third eye! USE THE DISCOUNT CODE 2020 and get 20% off!
 
If you haven't joined the challenge yet, see how to join here! 

At the end of the challenge, there will be a GIVEAWAY to a special winner! I will be giving away a free copy of "How to Communicate with the Angels", along with a beautiful spread of raw vegan nut butters from My Raw Joy. The way you can participate in the giveaway, is by doing the following:

1. Subscribe to my YouTube channel and newsletter

2. Like and comment on every single video of the challenge, sharing your experience and progress with us!

3. Follow me on all social media accounts (@celiahjorth @celiasveganjourney @consciouscreatorreality)

4. OPTIONAL but gives bonus points: post photos on social media of your progress and tag me on all the three accounts above. 

Will you join?? I hope to see you there ! Let's do this together and let's make 2021 the best year of our life so far :) That is my goal for every year and it starts right now!

The BEST Green Juice Recipe (NO BLENDER)

GreenJuice

Are you ready to get greenyfied?

Welcome back to the blog! Today I am going to share one of my absolute go-to recipes, my daily green juice. I want to share it with you, because it is so simply and so easy to make. In my personal opinion, starting your day with fresh greens and liquid, is one of the best things you can do for your skin, health, happiness and energy levels.

While there is not much research on the subject yet, research suggests that eating greens on the daily can help reduce inflammation, heart-disease risk and age-related mental decline. There is also evidence that certain compounds in fresh juice can function as prebiotics, and prebiotics are related to healthy digestion, weight management and improved immune function (source). Simply put, it is also a very easy way to get in your daily dose of greens without having to chow down a giant bowl of salad!

While the juicing process can entail having a fancy juicer, going through pounds and pounds of fresh greens and vegetables, I wanted to make this recipe which is easy, simple and accesible for the average person with an average kitchen! Minimal dishes need to be cleaned!

If you haven't tried a green juice yet, and if the thought sounds unpleasent to you, please don't let it stop you. Because of the coconut water, this green juice has a pleasent and mild sweet taste that matches wonderfully with the earthy taste of the greens. Give it a try and let me know what you think!

BEST Green Juice Recipe (NO BLENDER NEEDED)

 
Author: Cecilie Hjorth
PREP TIME: 5 minutes
TOTAL TIME: 5 minutes
Servings: 1-2 cups of green juice
Category: Breakfast / Drink
Cuisine: Raw Vegan, Juicing
Does it keep? 2 days in a glass bottle in the fridge
  

Ingredients

Instructions

  1. Wash the greens thoroughly. Juice the lemon. Add all the ingredients to a blender and blend until smooth.

  2. Serve and drink fresh!

If you need more liquid, you can always add more coconut water! It stays good in the fridge for up to 2 days, but it is best drinked straight away for the taste and nutritional content.

Want more?
 
RawAbundance FinalCover 3d

Check out my Raw Vegan Recipe book, Raw Abundance,  with over 30 delicious, healthy meals that are completely model diet approved!
 
Subscribe to my newsletter to get a free guide on CDS.

Vegan Protein Oatmeal

Hi guys and welcome back to my blog!

Yesterday I shared a post on my Instagram talking about something very close to my heart: Nutrition!

As a model, it matters what you eat, not only for your looks but also for your energy levels. It's a busy and demanding lifestyle that sometimes include last minutes schedule changes, lots of traveling and early mornings. And of course, strenuous workouts. For that, I want to eat my best to look and feel my best.

In my post, I shared how I see the daily choices of our meals and how they affect our lives

https://www.instagram.com/p/BvEl2OPj3Xe/

I promised to share the recipe of the oatmeal from the post, so here it is. This oatmeal is inspired by Romee Strijd

Vegan Protein Oatmeal

 
Author: Cecilie Hjorth
PREP TIME10 minutes
TOTAL TIME10 minutes
Servings: 1
Category: Breakfast
Cuisine: Gluten-Free, Vegan, High-protein
Does it keep? 1 Week in fridge
  

Ingredients

  • 1/2 cup rolled oats
  • 1 scoop (30 grams) hemp protein powder (use all natural, no added flavors. I use this one from MyProtein)
  • 1 Tbsp chia seeds
  • 1 cup water
  • 1/4 cup soy milk (optional, makes it more creamy in my opinion)
  • Pinch sea salt
  • 2 tsp vanilla extract (optional for extra sweetness)

Toppings

Instructions

  1. Add all ingredients, except toppings, to a small pot and put over high heat. Bring to a boil and stir continuously for 30-60 seconds until thick and creamy. Transfer to a bowl (I love to use these bowls)


  2. Chop the strawberries and top oatmeal first with soy yogurt, then berries, almond butter, maple syrup, and finish of with cinnamon.

  3. Serve and eat right away. 
Want more?
 

Check out my Raw Vegan Recipe book, Raw Abundance,  with over 30 delicious, healthy meals that are completely model diet approved!

Vegan Snickers Recipe

Snickers

Hi guys and welcome back to my blog!

I hope you are all well, despite everything going on in the world. Before I even get in to the recipe, I just want to mention that I just published a free guide on CDS, a substance having been proven to be effective against corona, and I want to spread it for free. Just scroll down to the bottom of my website and subscribe, and you will get an email with the download link :) Feel free to share this information with others by referring them to my site.

Anyways, back to the food topic!

With all the time at home, I end up cooking a lot, because it is something that really calms me down. And let's be honest, I like to eat. Does that happen to anyone else? Obviously, as a model, I have to be considerate about what I am eating, generally I only eat processed and refined food 1-2 times per week, so in-between that, I make healthy recipes like this one, so I can still "indulge"!

These vegan snickers bars not only taste amazing, but they are completely refined sugar-free and low fat as well! They contain very few ingredients and only take 10 min to prepare. I may have made them several times this week already *confession*.

To see how to make them, watch video below or follow instructions further down.

Vegan Snickers Bars

 
Author: Cecilie Hjorth
PREP TIME10 minutes
TOTAL TIME: 2 hours
Servings: 4-5 bars
Category: Dessert / Snack
Cuisine: Gluten-Free, Vegan, Low-Fat
Does it keep? 1 month in freezer
  

Ingredients

Toppings

Instructions

  1. Pit, and soak the dates in warm water for 1-2 hours.


  2. Add the dates, peanut butter, salt and vanilla to a blender and blend until smooth and creamy. If needed, add a bit of water or plant milk to make it blend, but make sure it still maintains a caramel-like texture.

  3. Keep 2 Tbsp of the date caramel in the blender and add the oat flour. Blend. As well, add small amounts of liquid if needed.


  4. Add the oat layer to a Tupperware. Then top with caramel layer and sprinkle with peanuts. Add to the freezer for 60-90 minutes for it to set.


  5. After 90 minutes, start preparing the topping by melting all of thetopping ingredients together in a bowl placed over a pot with boiling water. Stir frequently. Once fully melted, take the Snickers out of the freezer and add the chocolate on top. As the snickers is already frozen, the chocolate will harden quickly. Wait 5 minutes and it is ready to serve and eat!


I hope you like it! If you make it, take a photo and tag @celiahjorth on Instagram and I will re-share it on my stories!

Want more?
 

Check out my Raw Vegan Recipe book, Raw Abundance,  with over 30 delicious, healthy meals that are completely model diet approved!
 
Subscribe to my newsletter to get a free guide on CDS.

CECILE HJORTH

Copyright © 2020
All information, content, images and logos on this site contain trademark registration and intellectual property rights of the author under the international regulations of Creative Commons Attribution International license. It is forbidden the partial or total reproduction of what is shown here without prior consultation and / or request.
Stay Connected

Newsletter